MED-EL
Published Jul 08, 2020 | Jul 17, 2024
Use This Fun Ocean Activity For Auditory Training
This summer-themed activity to do with your child at home—or at the beach—can help them develop their listening and speaking skills during the summer holidays.

First, download the ocean-themed handout for the following activities here.
Introduce the Game
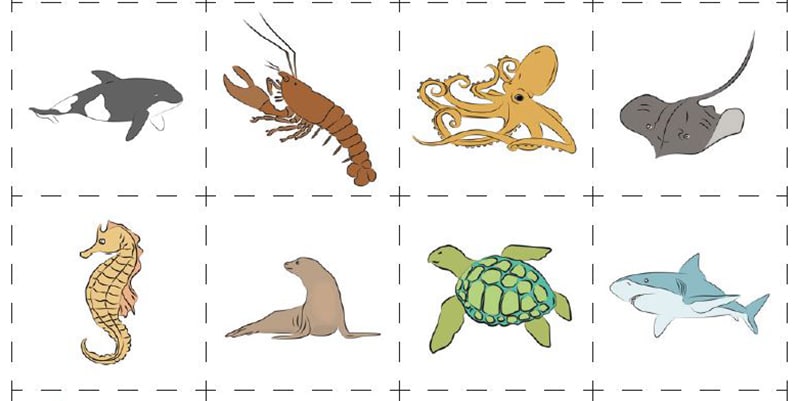
- Print out the animal pictures.
- Talk with your child while you cut out each picture. If your child is older, they can help you. Name each of the animals, and talk about what they look like, where they live, how they move, and what they might eat. This will help your child learn the name of each animal as well as many other words related to the animals, helping to expand their vocabulary.
- For example: This one is a crab. It has a hard shell to protect it. It has 8 legs and 2 claws. You have to be careful because the claws are very strong. Crabs live in the rocks.
- Or a more complex description for older children: This one is a seal. Seals are mammals and have dense fur and thick layers of fat (known as blubber) to keep them warm in the ocean. Seals swim and dive in the ocean. Often you can see seals sitting on rocks in the sun. Seals eat small fish.
Get Creative
- Take a large piece of paper and draw the top of the water, rocks, and sand. Talk to your child about what you are making together and link this to what they already know about the ocean. You could also show your child a picture from a children’s book about the beach or a photograph of a trip to the beach or a lake to help them to understand what you are drawing.
Talk About What You See
- Arrange the animal pictures in a pile face down and place the large piece of paper in front of your child.
- Pick up an animal picture, talk about what the picture is, and then show it to your child. If your child is older, you can have them guess what it is before you show it to them. If your child is unsure what it is, give them more clues, such as the color of the animal or the first sound in the animal’s name.
- Talking about the picture before showing it will also help your child focus on listening to your words. It will also support their auditory memory since they have to remember your clues and piece them together to guess the animal. For example: It’s an animal that has very sharp teeth and a pointed fin on its back.
- If your child is interested in finding out more about any of the animals, look up more facts on the internet together.

Teach Vocabulary
- Decide with your child where the animal should go on the paper. Talk about the locations to teach your child these concepts. Emphasize location words so they stand out . For example: The shark could swim at the top of the water, next to the rocks, or at the bottom of the ocean. Where do you want to put it?
- Encourage your child to give you instructions about where to stick the animal once you have guessed. This will give them the opportunity to use location words in short phrases.
- Take turns picking up the animal cards and describing them. Encourage your child to describe the picture to you when it’s their turn. If this is difficult for them, ask them to simply say the name of the animal or what color it is. Then you can provide more descriptors when they show you the picture.
Make the Game Reusable
- When all the animals are on the paper, paint over it with blue watercolor paint, or cover the page with blue cello wrap to represent the water. Or, laminate it to make it waterproof and take it with you on your next trip to the beach!
- Display your collage on the fridge or wall so your child and family can continue to talk about the animals, what is happening in the picture, and the process of making the collage together. You may also continue to use the collage for ‘I spy’ guessing games to continue to develop your child’s auditory memory and vocabulary when they listen to the descriptions or clues you give.
Looking for more rehab activities you can do at home with your child? Find out how you can use the MED-EL Lesson Kits to develop your child’s listening and language skills at home. And if you’re interested in more shared book reading, check out the Murat Reader Series.
References

MED-EL
Was this article helpful?
Thanks for your feedback.
Sign up for newsletter below for more.
Thanks for your feedback.
Please leave your message below.
Thanks for your message. We will reply as soon as possible.
Send us a message
Field is required
John Doe
Field is required
name@mail.com
Field is required
What do you think?
© MED-EL Medical Electronics. All rights reserved. The content on this website is for general informational purposes only and should not be taken as medical advice. Contact your doctor or hearing specialist to learn what type of hearing solution suits your specific needs. Not all products, features, or indications are approved in all countries.

MED-EL

MED-EL


